My dear friend Laura commissioned me to make a gluten free cake for her mum's 60th birthday party. I was delighted to be asked and even more excited that Laura wanted to use some beautiful and very lifelike edible butterflies she found on Etsy (take a look at Sugar Robot's shop to see the amazing range of cake toppers they have). In fact the whole design was created by Laura, who wanted a two tiered gold cake with lots of butterflies down the side. All I had to do was recreate her vision. Here's how it turned out:
This was a fairly straightforward cake to make as all the impact comes from the butterflies themselves. I started with an 8" and a 6" round cakes which were gluten free orange and elderflower filled with homemade orange curd Italian meringue buttercream. Apparently Laura's mum was very intrigued by the sound of my Italian meringue buttercream from reading this blog so if you are reading I hope it lived up to your expectations!
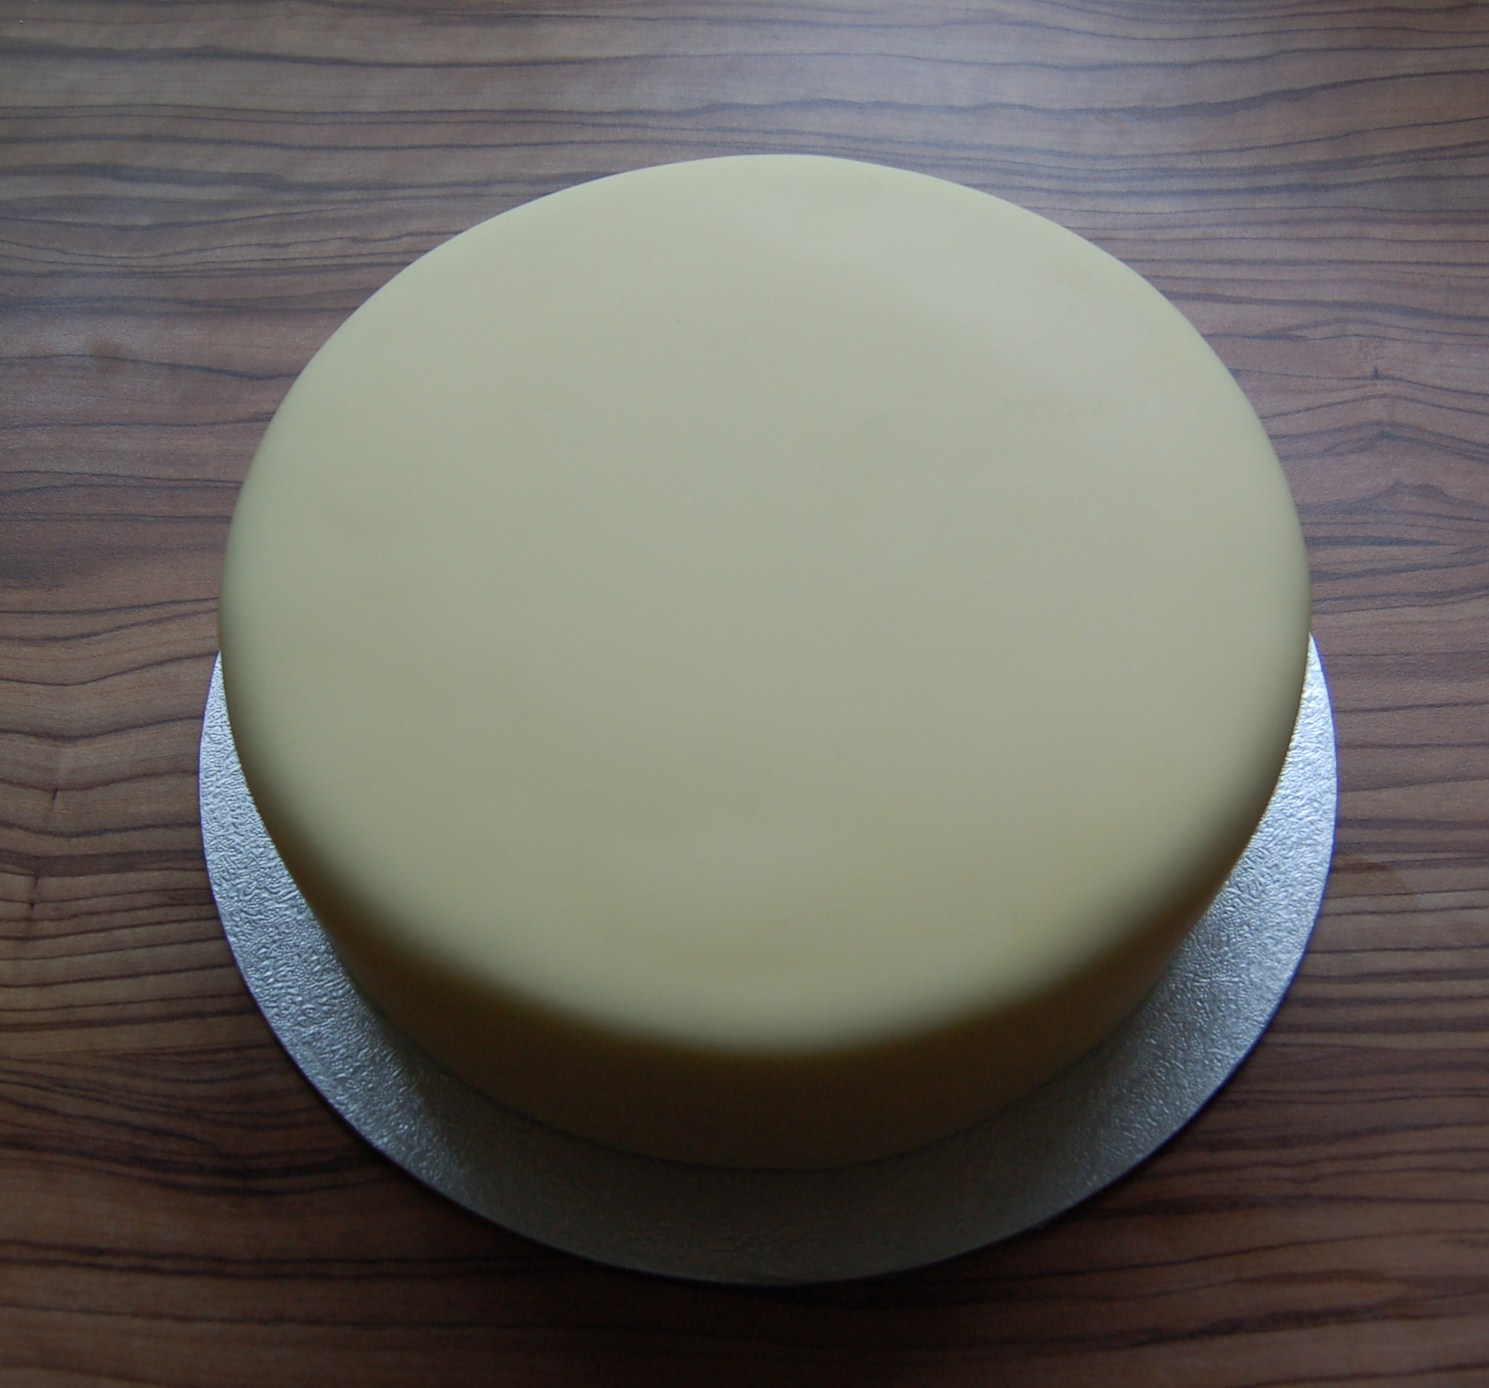
I covered each cake with a pale yellow sugarpaste:
And then brushed on metallic gold lustre dust with a pastry brush. This is quite a messy job and I seemed to get gold dust over everything (actually this isn't limited to just gold dust in my kitchen...):
I added some dowels to the lower tier to support the weight of the upper cake:
In fact as this cake had to travel 200 miles fully assembled I added an extra tall dowel in the middle which went up into the top tier through a hole cut in the cake board. This made it slightly tricky to assemble the tiers and make sure it was in the middle but it turned out well. A simple gold ribbon finishes the tiers off nicely:
Then to start adding the butterflies, which are made out of wafer and are very delicate to work with. I created a slight crease down the middle and attached with a tiny dab of edible glue applied with a very fine brush. You have to be careful as if you add too much glue then the butteflies actually melt and tear so there were a couple of casulaties as I got used to working with them.
I added the butterflies in diagonal drifts to make sure she size and colours were balanced:
It was tempting to keep adding more, but I felt like this was just the right amount to finish the design:
The cake then travelled from Brighton up to the Midlands in Laura and her boyfriend Slim's converted ambulance campervan for a big birthday bash weekend. I packed a few spare butterflies in the cake box just in case there were any casualties. Luckily it survived the journey and everyone was pleased with the cake at the party. I can't wish for any more than that - a very happy birthday Laura's mum!
I would find it very hard to live a life without cake - it would be a very rare occasion that you would walk into our kitchen and not be able to find a slice of homemade cake or a sweet treat to go with a mid morning or afternoon cuppa (and even then there is probably a secret stash in the freezer too). But a few of my friends and Brighton Bakery customers aren't able to enjoy regular cakes as most cakes use regular wheat flour, and that's no fun if you're gluten intolerant.
So I'm particulary sympathetic to those who are are gluten intolerant, especially as a lot of the gluten free treats I've tried on sale in the supermarket are far inferior in taste and texture to their wheat based versions. I've dallied with a few GF recipes in the past for our market stalls and for various cakes I've made. An excellent book I use a lot is Harry Eastwood's Red Velvet Chocolate Heartache, where all the recipes can be made with either regular or gluten free flour, and they have the added bonus of being better for you as they use grated vegetables and ground almonds to reduce the fat and sugar content in the cakes.
So when I was asked to make a gluten free chocolate cake this recipe book was the first one I pulled off the shelf. The Light Chocolate Cake looked perfect, which uses grated butternut squash in the batter to keep in lovely and moist. Well how glad am I that I did a trial run of this cake, as it turned out to be a disaster! The cake took more than twice as long as it should have done to cook and despite the lovely quality ingredients and expensive organic cocoa powder I used it tasted really bland. Oh dear - having ticked and starred nearly every recipe I've tried in this book, this one got a big fat cross (I've carried on my mum's tradition of marking up her recipes - it's so handy when you try as many things in as many cookery books as I have).
I decided that I could do much better by tinkering with my favourite regular chocolate cake recipe instead. It turned out so well that I thought I would share the recipe with you - next time your gluten intolerant friends are round for tea you can let them eat cake.
Emily's Gluten Free Chocolate Cake Recipe
serves 25 party portions or 10-12 big slices 165g very soft butter
300g golden caster sugar
2 teaspoons vanilla extract
3 medium eggs
265g gluten free flour (I use Dove's Farm)
3 level teaspoons gluten free baking powder
1 level teaspoon xanthan gum
1 level teaspoon bicarbonate of soda
70g good quality cocoa powder (I like Green & Blacks)
250ml buttermilk
3-4 tablespoons milk
1. Preheat the oven to 180C and grease and line an 8" round deep cake tin.
2. In a large bowl, beat together the softened butter, sugar and vanilla with electric beaters or a freestanding mixer until pale and fluffy.
3. Gradually add the eggs to the mixture, one at a time, beating really well after each one (it's important to add them slowly and mix well otherwise the mixture can curdle).
4. Mix together all your dry ingredients really well and pass through a sieve to ensure the baking powder is evenly distributed.
5. Using a big metal spoon, fold about a third of the flour mix into the batter. Follow this by folding in about a third of the buttermilk, then keep alternating with the dry mix and the buttermilk until it is all incorporated. Finally add the milk so that you have a happy cake batter consistency (I find that the GF flour absorbs more liquid than regular flour - it's better to have a slightly looser batter than one that's too stiff as it can end up dry).
6. Bake for about 1 hour to 1 hour 10 minutes - if a skewer dipped in the centre comes out clean then it's done. Cool in the tin for at least 5 minutes before tipping on to a wire rack to cool completely.
7. Once cool you can cut the cake into layers and fill with your favourite icing - I think the best is a chocolate meringue buttercream but you could use a ganache or any filling you like. The cake should keep in an airtight container for up to a week.
I got some lovely feedback from the lady I made the cake for - she said the guests at the wedding couldn't tell any difference from a regular cake and the bride was thrilled she could actually eat the cake for once!
Last Saturday Melissa and I were back up in London for another party, this time to celebrate my good friend Polly and her boyfriend's new adventure, which will see them travelling across Asia for six months before settling down in Australia for a couple of years. So it naturally followed that the theme for the food was, er, Mexican! Polly had cooked up the biggest pot of chilli I had ever seen (which was delicious by the way) and she had also asked me to make a cake for the occasion. So carrying on with the Mexican theme, and also taking into account Polly's wheat intolerance, I made a gluten free lemon and lime cake for 50 people.
The recipe I use is based upon one in Harry Eastwood's Red Velvet And Chocolate Heartache, which uses finely grated courgettes and carrots as key ingredients in the cake batter. As well as being gluten free, it has the added bonus of only having about a third of the usual amount of sugar and also being dairy free, the only fat in the cake coming from the egg and ground almonds, which are much better for you than butter. When you describe the cake on paper you'd never believe how delicious it actually is, plus it has the huge advantage of being a cake that is actually good for you!
The only trouble with this cake, is that it can be slightly temperamental as the water content in the vegetables can vary hugely, depending on the season, their size and how fresh they are. This batch turned out to be extra moist and the cake took double the amount of time to cook than it should have done. Polly had given Brighton Bakery a mention in her party invitation and lots of my friends were going to be there too so there was really nowhere to hide if the cake turned out badly. I was worried.
The problem is, you can't cut a slice out of the cake to try it until it's too late. I had to have faith in my judgement and carry on with decorating the cake and at least this could redeem me if the inside turned out dry. Polly didn't want a cliched Mexican design with 3D cacti and sombreros so I had to think a little more abstract. My first thought was to try and replicate a Mexican cut paper design that my friend Laura used on a stunning cushion she made:
But alas I think this would be too intricate to do justice to the design in freehand, and I'm really trying hard not to keep buying new cake tools and cutters (honest Melissa!). I did like the idea of including birds, as it was a nice symbol for Polly and Michael flying away on their adventure. So I did a search on Google Images and came across the most fantastic Mexican bird design:
(NB If this is your image please let me know so that I can credit you!)
I knew I couldn't recreate the exact intricacies of the design but I used it as my inspiration and this is what I came up with:
The two birds have slightly different designs, all cut free hand from sugarpaste (and with the help of two piping nozzles to cut the circles).
I finished off the design by adding some colourful flowers round the outside and some added details in the same colours used on the birds. As always, it took me longer than I thought it would as all the individual cut out pieces are quite fiddley but I was really pleased with the result:
Melissa and I dropped the cake off at lunchtime and Polly and Michael really seemed to love it. Polly said that she's the smaller bird - I'm still trying to figure out which one that is, considering they were cut from the same template...
We left for a few hours to take advantage of an afternoon in the capital. We took a walk round Borough Market then along the South Bank to the National Theatre to look at the landscape photography exhibition and a quick look into the Tate Modern. There's few things I miss about London, but those are probably my top 3 favourite places that I used to enjoy going to. All the while we were enjoying our afternoon of culture, I had a niggle in my mind and a worry in my belly that the cake was going to be dry which meant I could never fully relax. Melissa and I went back to the party at about 6pm and two thirds of the cake was already gone. That had to be a good sign but I was still worried. I had to try a slice for quality control.... luckily it was still lovely and moist and really tasty. If I was really nitpicking the very edges were just a little too browned but it didn't seem like anybody else noticed, and by the time we went there were only 3 slices left. Hurrah!
So Polly and Michael - it was a great party, we loved catching up with everyone and will really miss you. Stay in touch and roll on 2014 for when you return :o) xx
It's been a busy week in the Brighton Bakery house but I've finally got some free time to catch up on some overdue blog posts. I'm pleased to report that Slim loved his Handyman 30th birthday cake and it went down a treat at his party with people going back for third helpings on the excuse that it was helping them towards their 5-a-day! I thought that the lovely readers of this blog might enjoy seeing how it was made, so I invite you to pour yourself a hot cup of tea and a slice of homemade cake (it's a longer blog than normal today so you may need extra sustenance) and read on...
The cake was going to be picked up on the Friday, so I had to work backwards when everything should be made: Friday morning - final decorations to be added Thursday - make buttercream, fill cake, cover with marzipan and sugarpaste, make decorations, cut and cover 3D numbers Wednesday - bake cake and leave to settle overnight, make rice krispie cake and refrigerate overnight, shop for ingredients
Although it's not flat out work all day, some people are surprised that it takes 3 days to make a cake, which is why it's important to give any cake maker as much notice as possible so that they can plan to be free for those 3 days!
Making The Cake
Slim has an intolerance to wheat, so I had the opportunity to try out a new recipe for this cake - something I love to do, but always requires a bit of faith and finger crossing to ensure it turns out right! The recipe I had chosen is for the Autumn Wedding Cake in Harry Eastwood's Red Velvet & Chocolate Heartache which handily is already designed for a 10" square cake so I didn't need to worry about scaling up a smaller recipe. It wasn't perfect though, as the flavours are Orange and Elderflower which was just a bit too girly for this handyman cake. So I adapted the recipe and changed the flavour to lemon with a hint of orange thrown in for good measure. Perfect.
The slightly annoying thing about this recipe is that it requires the zest of 12 lemons and 2 oranges which becomes quite grating (excuse the unintential terrible pun) after about the 4th fruit. Plus you're left with all those zested lemons to use up, but being the frugal housewife I am, I made them into a lovely batch of homemade lemon cordial which I used in the cake and some zingy sorbet - yum.
What I do love about this cake (and other recipes in Harry's book) is that it's much better for you than your average cake, without comprimising on flavour. It contains no butter, less sugar than normal and very little (gluten free) flour, instead replacing them with ground almonds and a small mountain of grated vegetables.
The result is a very tasty, moreish, super moist cake that is sturdily perfect for the job of being covered with sugarpaste icing. Whilst I'm sure I can convince you on the taste, there's no denying that cake batter itself looks like was beaten with the ugly stick:
Still, don't let this put you off - have faith and you will be rewarded with a delicious cake in a couple of hours's time.
Once the cake is baked I always leave it overnight, well wrapped, to settle - this makes it much easier to cut the horizontal layers the following day.
While the cake was in the oven I made the Rice Krispie Cake for the first time since I was about seven - it was a tip I'd seen on the TV show Cake Boss where you can use layers of Rice Krispie Cake to create trickier shapes than you can create with cake. It takes just a couple of minutes to make then it must be pressed down firmly and refrigerated to make it nice and firm for carving the 3D 30 for the top of the cake. Easy peasy.
Assembling The Cake
The following morning, rearing to go, I whipped up a big batch of lemon buttercream to fill the cake. I levelled the top, then flipped it upsidedown so that what was the bottom of the cake gave a nice flat top. As it was quite a moist cake I wimped out of cutting into 3 layers and just split it in half and filled with an extra generous layer of buttercream:
And then smoothed a thinner layer of buttercream over the top and sides:
The cake was then ready for a covering of marzipan, which adds flavour and helps give a good base for the final layer of sugarpaste. I smoothed down the sides and trimmed the edges, then brushed with a little lemon cordial to make it tacky:
I was always told to use just a very small amount on the end of a cocktail stick. Well this colour needs a lot of cocktail sticks' worth of colouring to give you a nice yellow. I got a little frustrated with it so I moved onto the red instead to see if that was any better. In hindsight I might have been better using a shovel than a toothpick for the red - it took me more than an hour of kneading, adding way more colour than I thought it would need each time and then it still turning out a very disappointing pink. Tip for next time - buy red ready made! It will save an enormous amount of time and frustration.
Still I got there in the end and finally covered the cake with the yellow paste and added a red trim to finish it off:
Making the 3D 30
The Rice Krispie Cake had firmed up nicely in the fridge overnight and was ready to be carved. I made a template out of paper and cut out the numbers:
I did a base layer of white sugarpaste over the numbers to make it smooth, then brushed with a little cordial to make the next layer stick and added pieces of red on top:
I wanted to make it look like Mini Slim had built the 30 so I added some extra cuts to look like it had been made from pieces, then made some screws from grey sugarpaste with the end of a piping nozzle:
I made small indentations with a ball tool and secured the 'screws' in place. I couldn't find any edible glue in my cake supplies shop so instead I used some vanilla extract and a fine paintbrush. I then used a small knife to add line for the head of each screw:
Making Mini Slim
I've not made a person out of sugarpaste before but I was really looking forward to this bit. I thought my original idea of having Mini Slim sawing some wood was a little ambitious for a first attempt, so instead I decided to have him sitting on top of the 30 holding a screwdriver, having finished his handymanning.
Having coloured up some modelling paste in a denim colour (I mixed Sugarflair Liquorice and Ice Blue) I rolled a long sausage shape, cut a triangle out of the middle and folded in half to make the legs. I made some trainers from white sugarpaste and fixed these pieces in place where he was going to sit:
Then I made his top - to match the blue hoodie Slim was wearing the last time I saw him (the cocktail stick helps keep it sturdy and is for attaching the head):
I then followed this very handy video for making the face (if you do watch it I highly recommend turning off the sound - don't say I didn't warn you...):
I then added some hair (made using a garlic press as I don't have a clay gun), a teeny pencil for behind his ear and a screwdriver for his hand:
I made a few more tools and a toolbox which I secured with a little more vanilla extract the following morning, and the cake was complete. I then went mad taking dozens of pictures from every angle. It's a good job Mini Slim is a natural in front of the camera and a very happy model.
Despite being decapitated in transit to the party (darn cake box wasn't tall enough) I hear Mini Slim survived being eaten and is still alive and well back in Preston Park, with his toolkit at the ready for his next DIY job.
The whole reason that I wanted to start the Brighton Bakery was because I love designing and baking cakes. Especially big ones for special occasions. So I was thrilled to be asked by my good friend Laura to bake a cake for her boyfriend Slim's 30th Birthday.
Slim is pretty well known for being a rather handy man. Along with Laura's help, he has just converted an old ambulance into a campervan called Big Trev (check out the Big Trev blog for how they did it) and when they recently moved down to Brighton instead of buying a bed Slim decided to make one out of wood instead. Impressive. So of the 3 ideas I suggested to Laura for the design of the cake it's no surprise she thought that the handyman idea was perfect.
The birthday boy is wheat intolerant so I had a chance to test drive my first gluten free celebration cake. I knew that Slim loved the luscious lemon trickle mash cake I made a few weeks ago but it's quite fragile and I wasn't sure how it would scale up to a 10" cake. So instead I plumped for a recipe in my new Red Velvet & Chocolate Heartache cookbook (hate the title but love the recipes) that uses a similar mix of ground almonds and vegetables as the base and is designed to be made as a big cake.
It took a little longer than I thought it would to make, but I have to say I'm really pleased with how it turned out:
Laura picked it up this morning so it's yet to be revealed to Slim but I really hope he likes it. In my next blog I'll show you the making of....
Yes the time is nigh and I've got my apron on and sleeves rolled up for a full marathon day of baking in preparation for tomorrow's market stall. Already ticked off the list are the Sticky Jamaican Ginger Cake, Cinnamon and Courgette Cake and Nigella's delicious Italian Almond and Carrot Cake, and as I write there is a Luscious Lemon Trickle Cake rising nicely in the oven.
As you may have come to expect from me, this is no ordinary Lemon Cake I'm baking. The surprise ingredient in this one is.... mashed potato. I admit, this may sound like a cake catastrophe in the making, but I trialled the recipe as a thank you gift for our lovely friends Sheena and Nathan at the weekend and it was a real success. The potato keeps the cake beautifully moist and it also happens to be naturally gluten free which is a bonus for the stall tomorrow.
Even though this cake's a winner on the plate, getting it there is another matter. This recipe is like a naughty toddler that doesn't want to do what it's told. Perhaps it was the fact I was trying to make the cake with a hangover the morning before we were off on a 4 night camping trip and still hadn't packed that was the problem. The mixture kept splitting when I added the eggs and I had to employ my secret trick of using the hairdryer to warm the outside of the bowl of the mixer to help it emulsify (this was advocated by my tutor at pastry school so I'm not completely barking!). Then the mixture took about half an hour longer to cook than the recipe said it would and so it helped make us nearly an hour late to meet our friends for lunch. I gave it some stern words that it had better behave as I strapped it in to the back seat of the car and prayed that it would be good on the 4 hour drive to Wales.
Luckily it was and Sheena and Nathan seemed to love it. Potato is such a mild flavour that you really can't detect it at all and it gives it a wonderful texture. But if you're still a sceptic why not come by tomorrow afternoon to Queen's Park and try a slice?!
It's nearly ready to come out the oven so I must sign off and get back to the kitchen - 48 muffins, 32 brownies, 16 flapjacks and a Wholemeal Honey Cake still to go :o)
Although I was really pleased with our debut stall success at the Kemptown Carnival last week, a couple of the cakes and treats I made were virgin outings and hadn't turned out quite as I had hoped. With this in mind and with our upcoming market stall at the Picnic in Queens Park on Sunday 26 June Melissa and I made a pact that we would test every recipe first before selling to the public. We also want to add a few more recipes suitable for people with food intolerences and special diets so we can offer something for everyone. So baggy trousers at the ready, Melissa's on tasting duty and I'm back in the kitchen on a market stall mission.
Despite being the author of our worst selling recipe at the last market, I've decided to give Nigella another chance, and first up in the recipe trials is her Venetian Carrot Cake, which also happens to be naturally gluten free and dairy free. I hate the idea of using artificial or substitute ingredients to make it suitable for those with intolerances so I'm pleased to have found this recipe which doesn't require any. Now if you're imagining a tall and proud triple layered cake slathered with rich cream cheese frosting then you might be in for a suprise. This is a carrot cake of a completely different breed. It's handsome and elegant, unassuming and not at all show-offish, but boy is it delicious. Rich, moist and almondy, studded with booze-soaked sultanas and rounded off with lemon zest and the comforting spice of nutmeg, Melissa and I both agree it's a real winner.
But it's not just about the taste. They say the first bite is with your eyes and I'm not sure that people would be instantly invited to buy or licking their lips to try a slice. We're just going to have to try a little harder to and offer free samples to show Brighton just how good it is.
I also have a dilemma with the name - Venetian Carrot Cake just sounds pretentious and misleading. For selling at a market stall... this just ain't a carrot cake. People expecting the flavour of a traditional carrot cake might be disappointed. But it's so good I think it should be included, just with a little rebranding. Therefore I open this up to the lovely readers of this blog - if anyone would like to offer a better name please leave me a comment!